Creating scenario-based eLearning can not only be difficult but nearly impossible without a clear plan and the right tools. Enter Twine, a lightweight, open-source authoring tool that makes creating branching scenarios a breeze.
As an instructional designer, eLearning developer, or learning leader tasked with creating interactive scenarios that use branching logic, this is one tool you should have in your toolkit.
Specifically designed for creating non-linear stories and games, Twine is not only lightning-fast but simple to use. It allows designers to quickly build complex decision trees that larger, more well-known eLearning tools only wish they could. Another advantage is that Twine is free to download and use for personal or commercial projects.
For me, the absolute best part of Twine is that you can be up and running in less than 15 minutes! From installation to creating your first branching scenario to publishing a complete working version in a single, self-contained HTML file.
So, if that piques your interest and you have a few minutes to spare, start the timer, and let’s dive in…
What is a Branching Scenario?
Before we go too far, it is important to have a clear understanding of what branching scenarios really are. In the simplest of terms, they are an interactive form of learning that requires participants to be active and engaged.
A branching scenario is designed to challenge learners where they live by using true-to-life situations to present relevant problems or issues. These scenarios create decision-making opportunities where a learner is asked to apply what they learned in a meaningful, memorable way.
One of the most well-known examples of this type of learning is the Choose Your Own Adventure books many of us read as kids. These books ask readers to make decisions about actions the main character takes. The reader’s choices ultimately affect the outcome of the book.
The Basics of Twine
Despite the zero price tag, you should not underestimate the power of this little tool. In fact, Twine has enough bells and whistles to build advanced, interactive games. Projects, called stories in Twine, can easily be enhanced with:
- Images, graphics, or videos
- Cascading Style Sheets (CSS)
- Custom variables
- Conditional logic
- JavaScript
Even better, utilizing any of the tool’s advanced functionality does not add unnecessary complexity. Stories are easily published as a single HTML file that contains all CSS and JavaScript. Due to the use of open standards, the self-contained file is also universally compatible on virtually any platform or device.
When you are ready to get started, simply download the latest release of the tool. There are available versions for Windows, Mac, and Linux operating systems. Alternatively, there is even a web-based version of Twine if you are unable or do not want to install the software on your computer.
Learn More: Twine Cookbook
Creating Your First Story
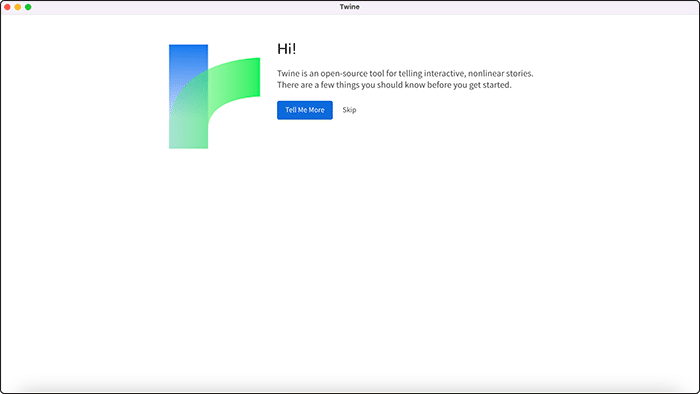
When you run Twine for the first time, it is a good idea to spend a few minutes looking around. A good place to start is by clicking the Tell Me More button for a brief introduction.
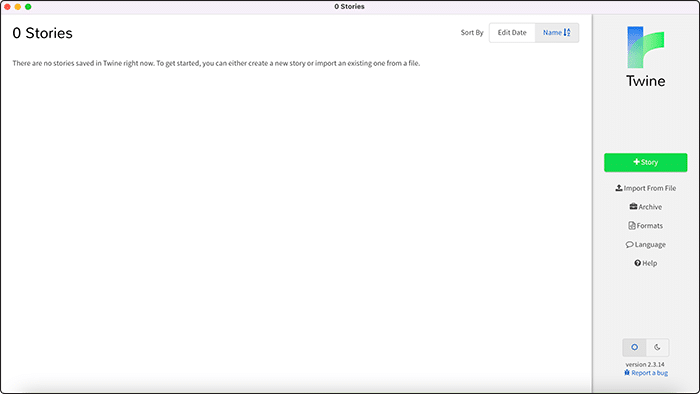
When you are ready to get started, click the +Story button.
A dialogue box will be displayed where you can enter a name for your new story. When finished, click the Add button.

At this point, you should be looking at the tool’s main interface, the graphical editor screen. In the center, a new Untitled Passage will be visible.
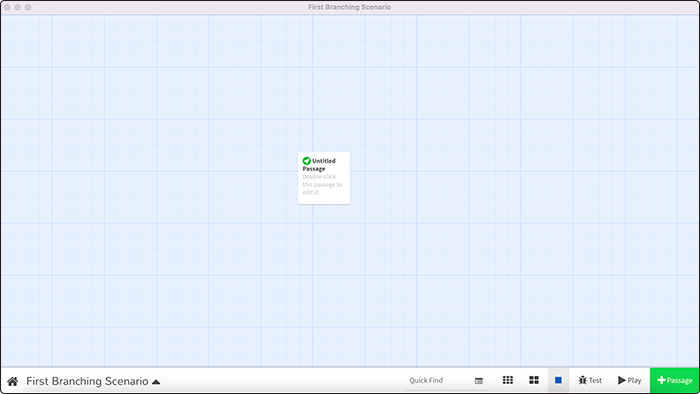
Stories are comprised of one or more Passages that serve as the building blocks of your project. These blocks allow you to break down more complicated concepts, like branching scenarios, into manageable chunks that can be easily arranged and interlinked with one another.
To create a branching scenario with Twine, first, double-click the Untitled Passage box. A new dialogue will appear containing a name field for your passage and a text editor. For this example, we will use this first block as an introduction or starting point.

Give the passage a name. Then use the editor to add some text to set up the scenario that will follow. Finally, you will need to create a link to the next passage.
This is where the true power and simplicity of Twine really begin to shine. Creating a new linked passage is as simple as wrapping your desired link text in double brackets like this: [[Get Started]]
When you close the passage’s dialogue box, everything you entered will be saved and reflected in the editor screen. As well, a new Get Started block will now be shown with a link to the first passage.
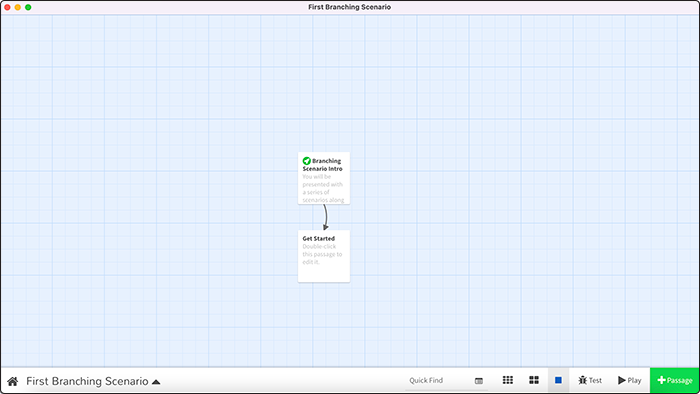
This is the complete process for creating linked passages.
Using the graphical editor, you can now quickly build out your entire structure. It doesn’t matter how complex your scenario may be or how many branches it ultimately contains, just repeat the process as many times as necessary.
Continue adding to your structure by creating new passages or linking to existing ones using double bracketed text. You are not limited to a single link; you can add multiple links in any passage. This will result in multiple new passages being created and linked.
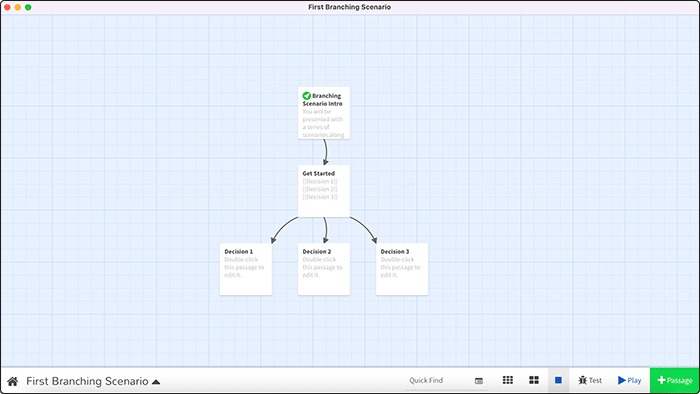
It is also possible to establish a link to an existing passage by typing its unique name in between the double brackets. As long as the text matches a passage’s title, Twine will find it and create the link.
There is virtually no limit to the possibilities.
Going Beyond the Basics: Testing & Publishing
Now that you have a handle on how to build your interactive branching scenario in Twine, it would be useful to actually see your creation in action.
The good news is Twine makes reviewing, testing, and publishing a breeze too.
As a developer, there is nothing more important than being able to quickly and easily test your work. To accomplish this, Twine has a “preview” mode which allows you to test links and interactive elements without the need for a web server.
To accomplish this, click the Play button on the toolbar located at the bottom of the editor screen. This will load your story using your default browser, allowing you to see your project in action and test your links. However, this is not a published file, it is simply loaded locally.
One minor inconvenience is the inability to make changes in the Twine editor and refresh the browser to see them. Instead, you will have to close the current preview and play a new one in order for the changes to be seen.
This can be somewhat time-consuming, especially if you are working with a very large project containing many branches. Having to click through double-digit links just to preview a change can add up quickly.
If you need to have a subject matter expert (SME) or stakeholder review your scenario, this local preview is not an option. For these situations, Twine allows you to publish your entire project with a single click. The HTML file output contains everything needed for your project to run properly on any web server.
This function can be found when clicking on the story’s title in the bottom left-hand corner of the editor. A new menu will appear with the Publish to File option.
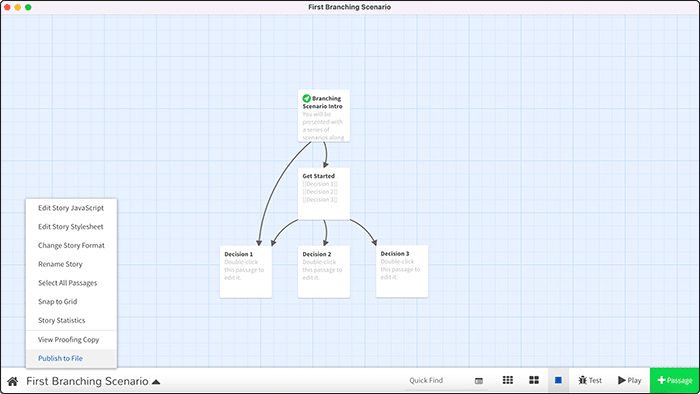
Additionally, there is one other useful menu item here called View Proofing Copy. Choosing this option will generate a text-only view in your browser. This unique view, similar to a script allows your text to be easily copied into another document for sharing.
This can save a lot of time going back and forth with SMEs and reviewers.
While there are quite a few other items in the title menu, most of them are more advanced in nature and beyond the scope of this quick start.
However, it is worth noting the Rename Story, Select All Passages, and Snap to Grid options do exactly what their name indicates.
A Functional Prototype
Christy Tucker is a Learning Experience Design Consultant and founder of Syniad Learning. Specializing in designing and developing scenario-based learning solutions, she has published numerous articles on the subject.
More specifically, she has written about different aspects of Twine including a detailed walk-through of a fully functional branching scenario.
The prototype presents participants with multiple levels of decisions which lead to one of eight possible endings. Not only is it a great example of what can be accomplished using Twine, but it is also an opportunity to experience a published scenario first-hand.
Final Thoughts
The true genius of Twine lies in its simplicity. Although it may be tiny in size and even smaller in cost, it is still a powerful tool that can simplify the development of all types of branching scenarios.
Over the last 15 minutes, we walked through everything you need to know in order to take advantage of the power and flexibility of Twine. While there are more advanced features and customizations available, they are not required in order to get started right away.
From creating your first story, passages, and links to the different options for previewing and publishing your scenario, you should now be well on your way to creating complex branching scenarios more quickly and easily than ever.
Are you currently using or are you planning to add Twine to your toolkit? What other tools do you use for creating branching scenarios? Connect with us and share your insight!
Don’t miss our upcoming webinar on October 14, 2021, Streamlining Branching Scenario Planning and Design featuring Learning Experience Design Consultant, Christy Tucker
- 3shares
- LinkedIn0
- Twitter0
- Facebook0
- Love This3


